
Latest version 241 Nissan Consult 3 Plus software was tested no issue with VXDIAG VCX SE and VCX NANO Nissan scanners.
The V241 uses a different patch as V226. In this version, you don’t need to install Nissan VCI driver separately, directly install driver in vx manager. So V241 software installation is slightly different from V226 version.
Software version: V240.10 (Setup V241)
Compatible devices: VXDIAG VCX NANO for Nissan, VXDIAG VCX SE for Nissan
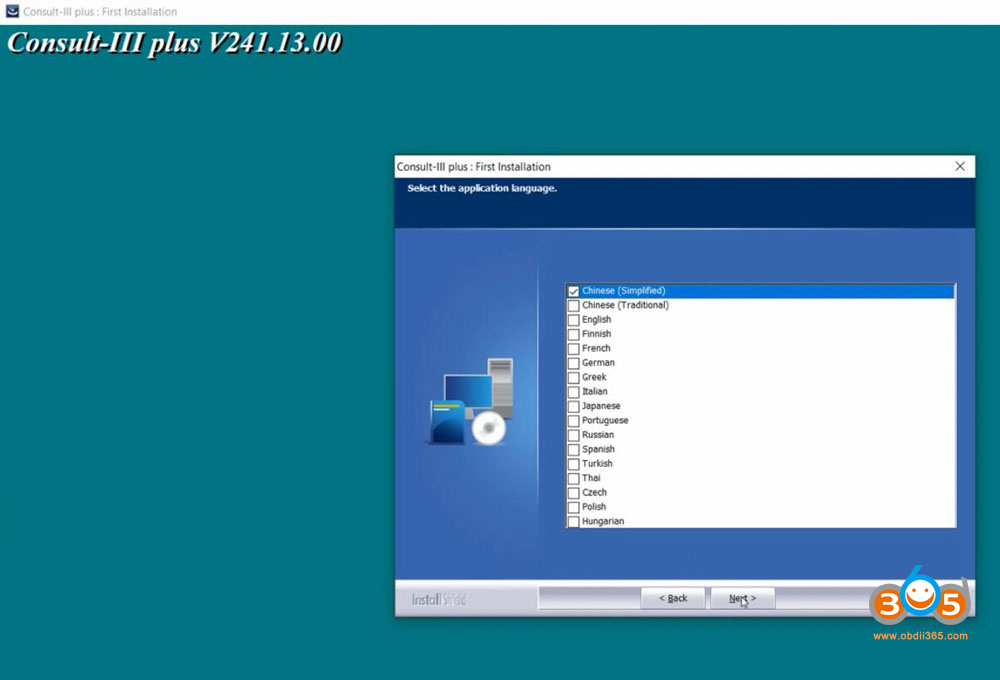
Multi-language: Chinese, Finnish, German, French, Greek, Japanese, Portuguese, Russian, Spanish, Turkish, Thai, Czech, Polish, Hungarian etc.
Operating system: Windows 10 64bit (free to try other systems)

Main steps:
Install software setup
Install database
Install VX Manger and Nissan driver
Free download Nissan Consult 3 plus V241 for Nissan
Download Link
Procedure:
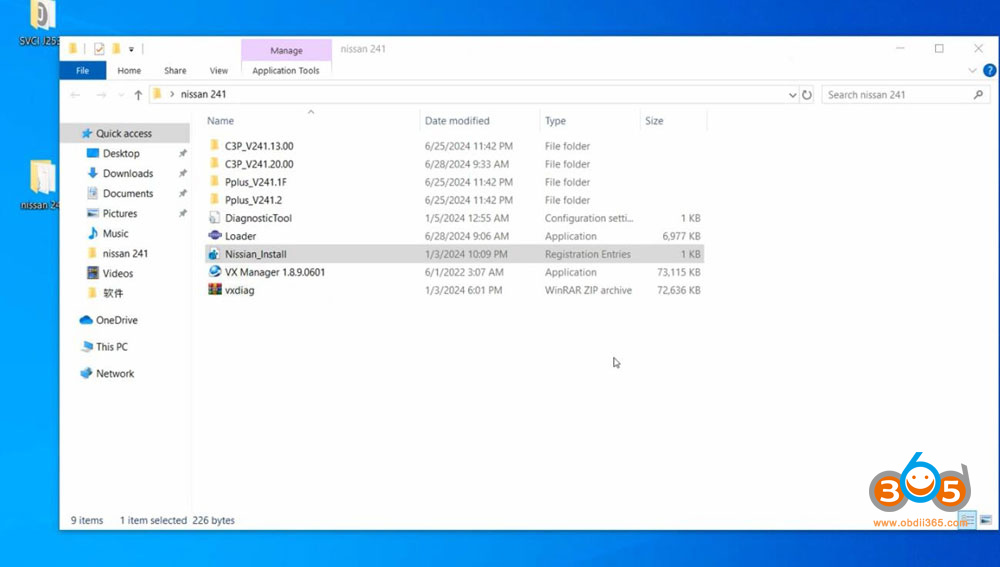
Download Nissan Consult 3 plus V241 software
Open software folder
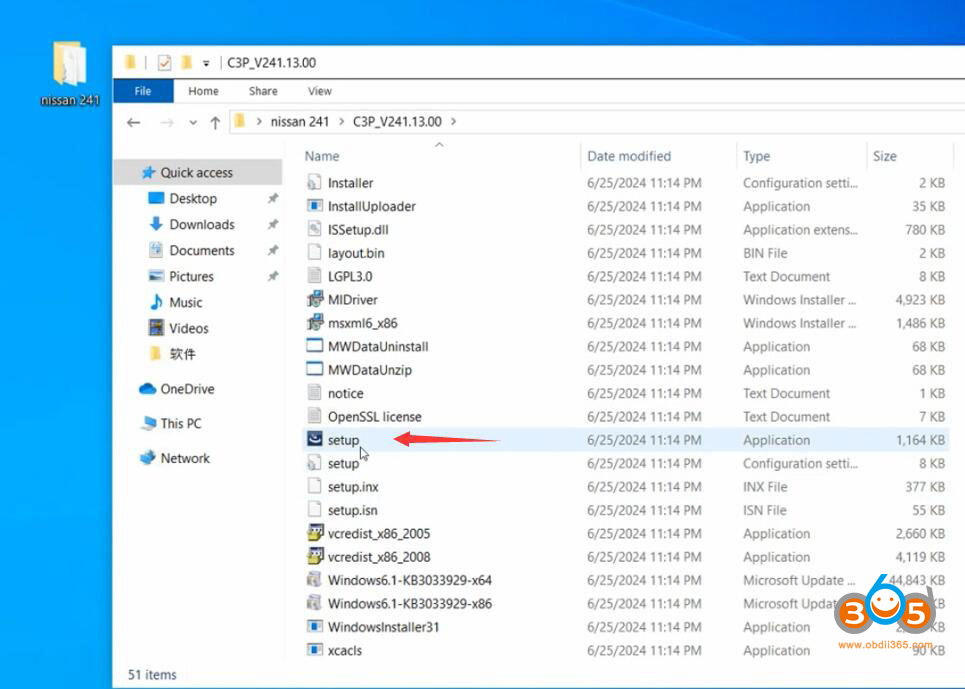
Open C3P_V241.13.00 folder
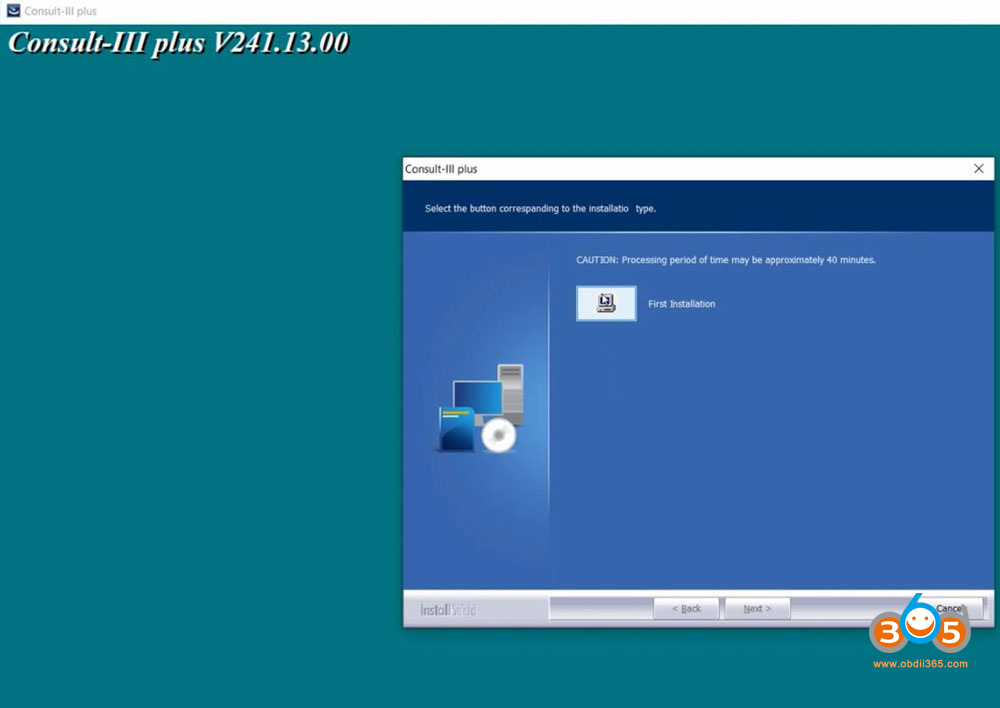
Run Setup as Administrator
Select First Installation and press Next
Accept license agreement
Select your region
Select your country
Select application language
Follow prompts to install set up until finished.
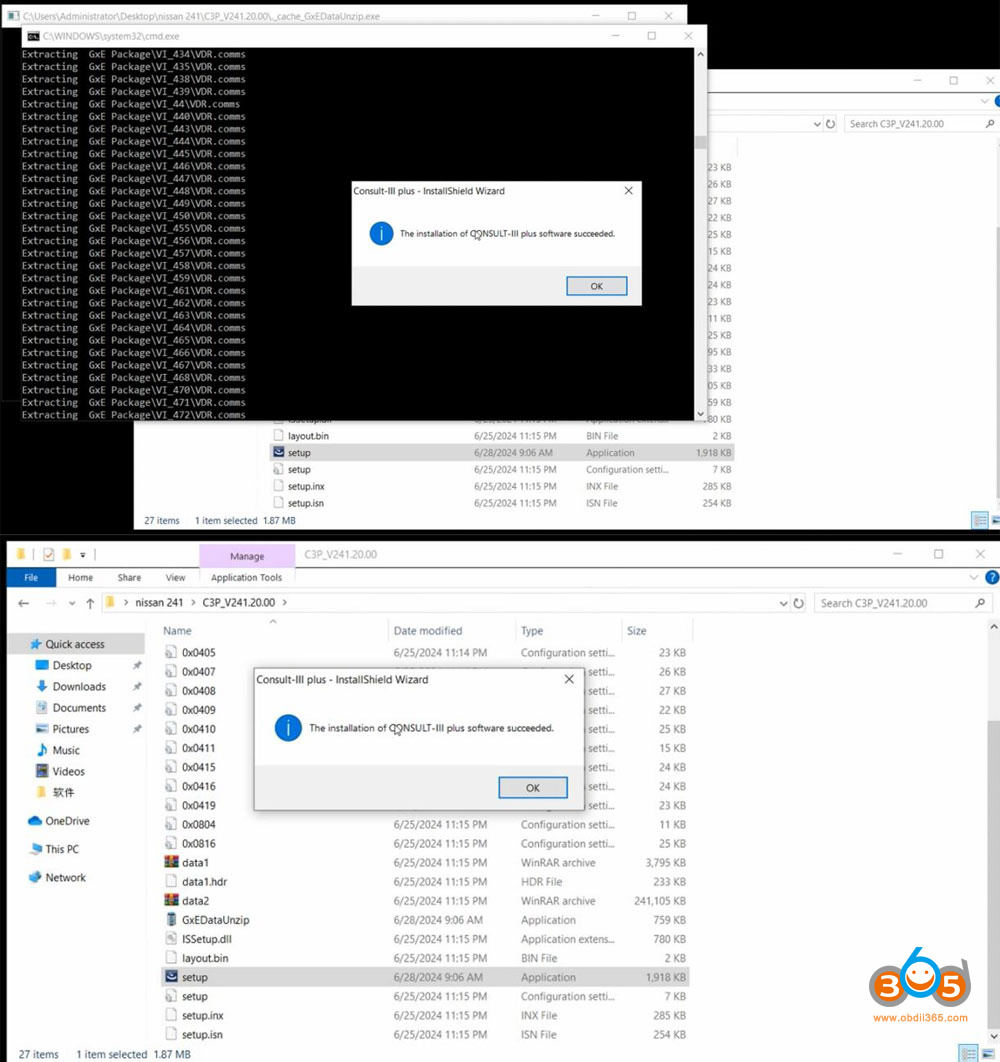
Open C3P_V241.20.00 folder
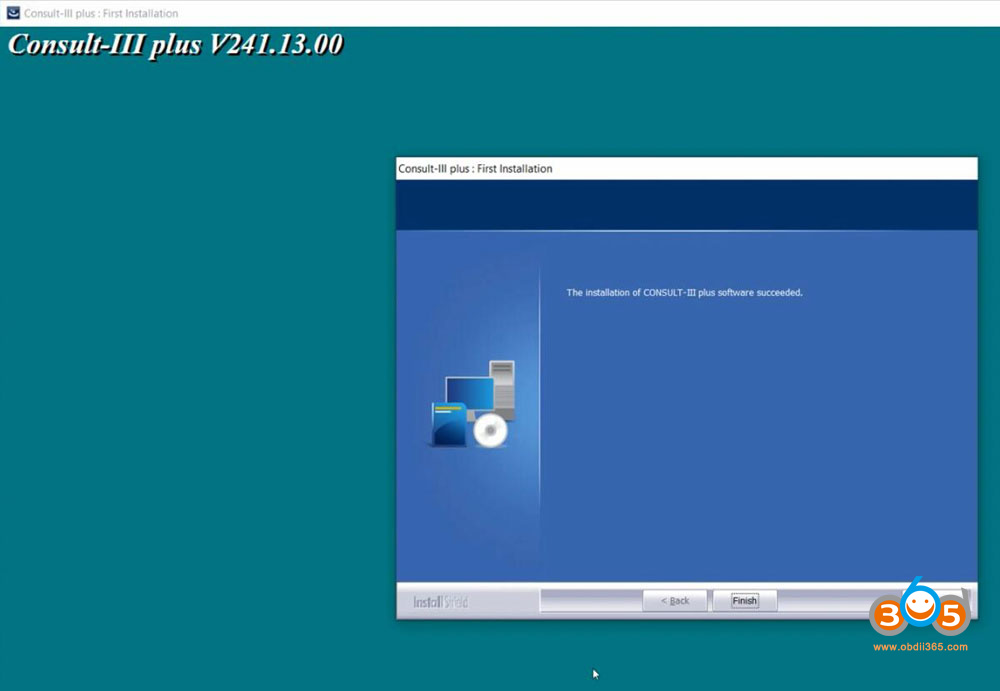
Run Setup as Administrator
Consult III Plus software installation succeeded

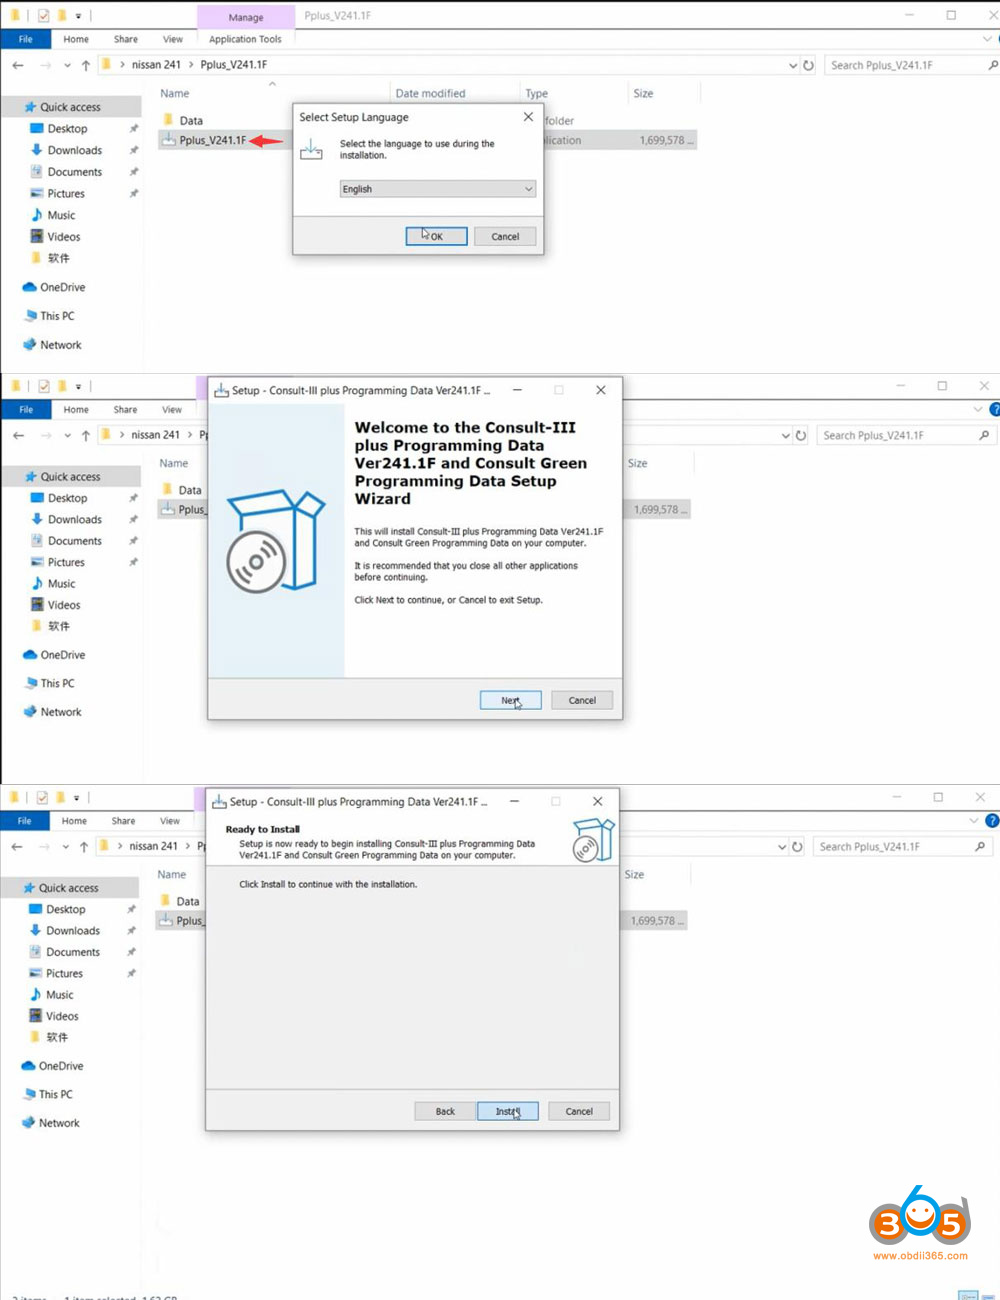
Open Pplus_V241.1F folder
Run Pplus_V241.1F program
Select setup language and extract database
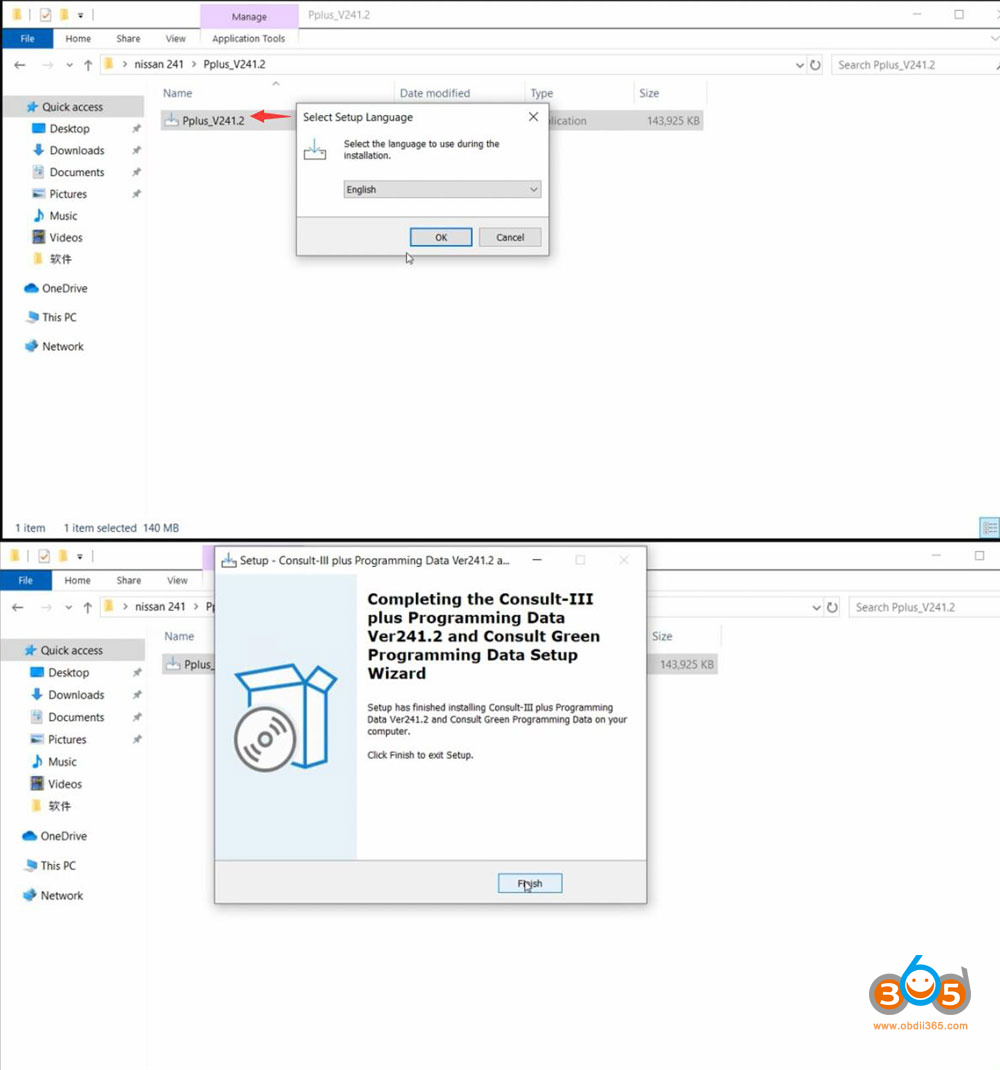
Open Pplus_V241.2 folder
Run Pplus_V241.2 program
Select setup language and install database
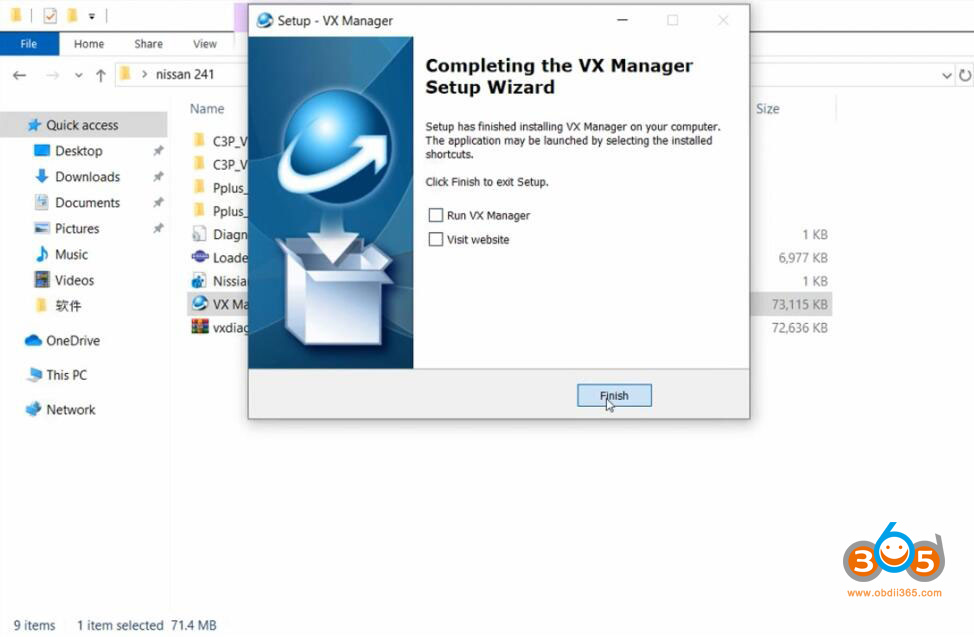
Install VX Manager
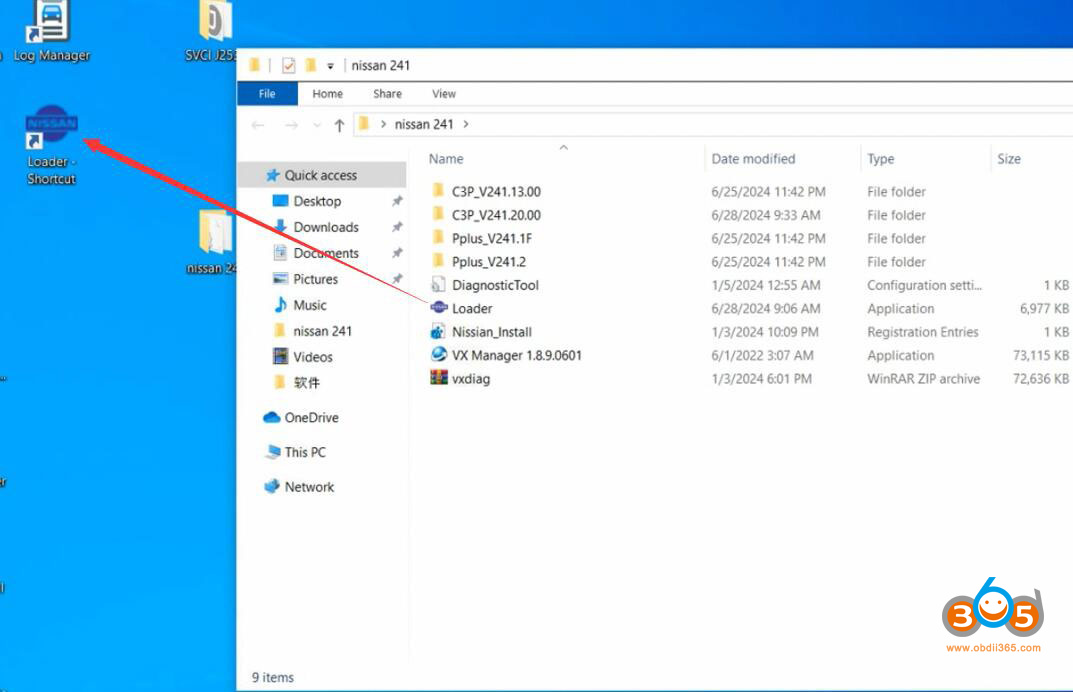
Send Loader patch from software folder to desktop shortcut
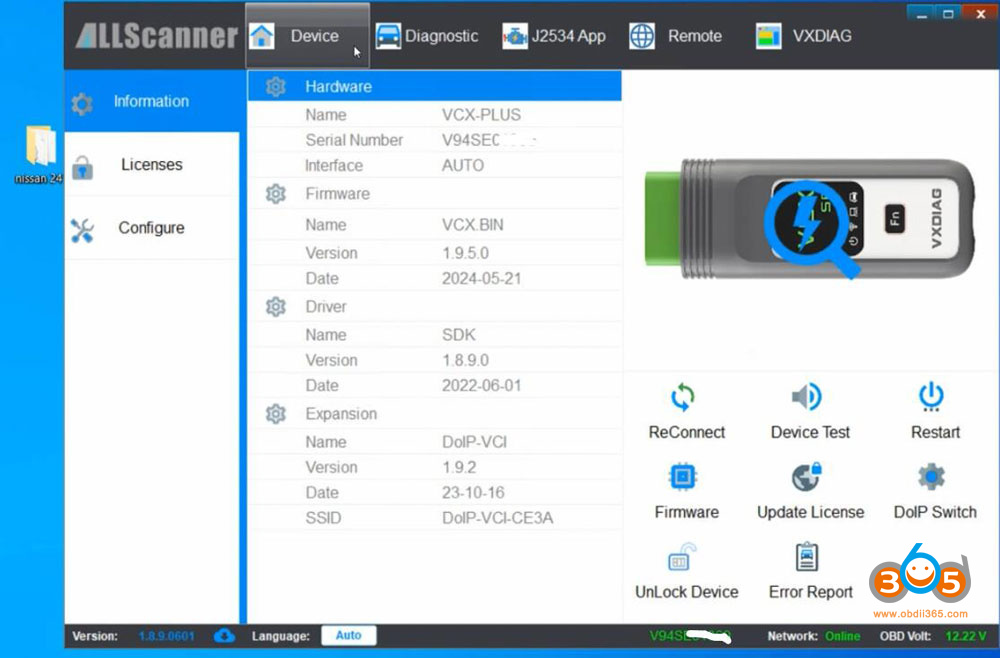
Connect VXDIAG VCX NANO Nissan or VXDIAG VCX SE for Nissan scanner with laptop via USB. Check device is well connected in vx manager.
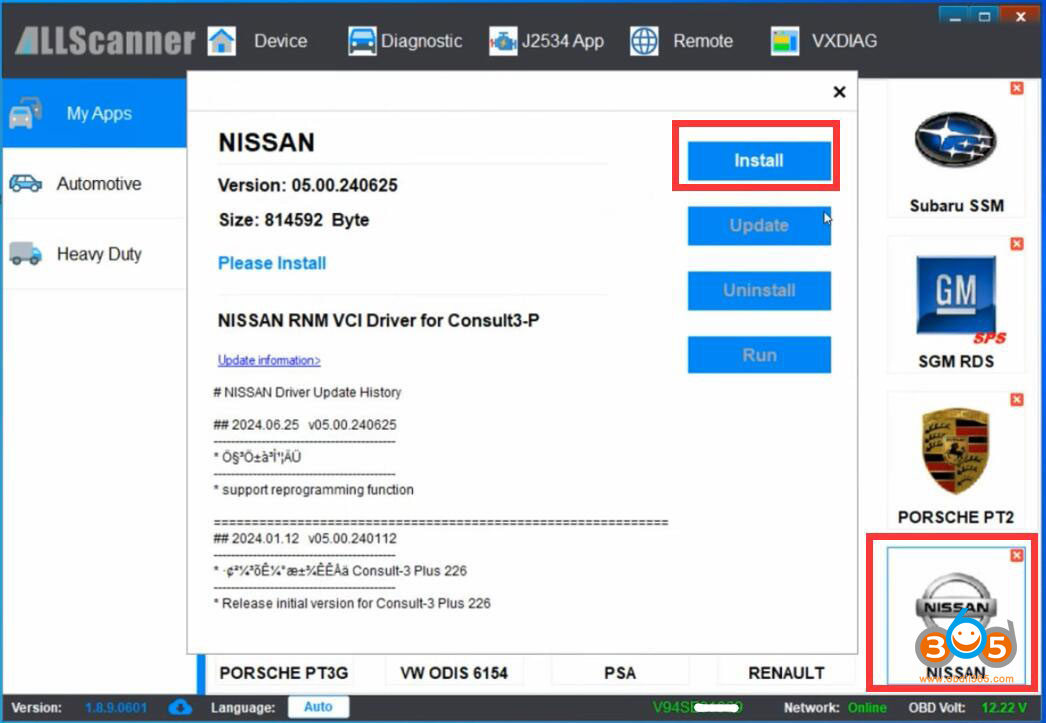
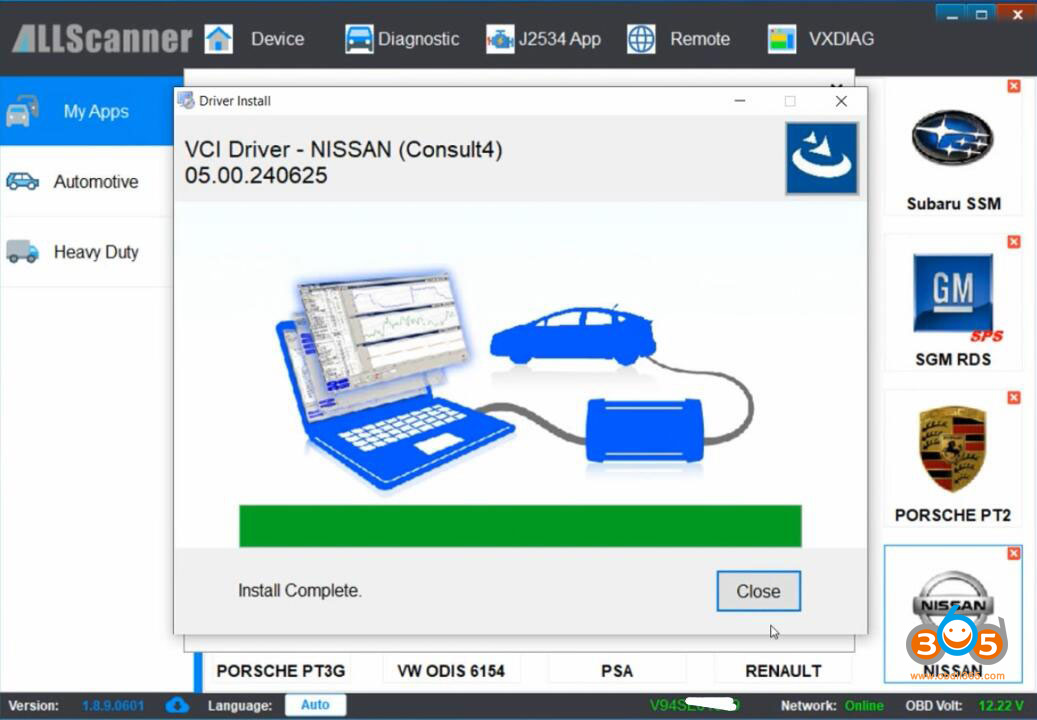
Install Nissan VCI driver in vx manager
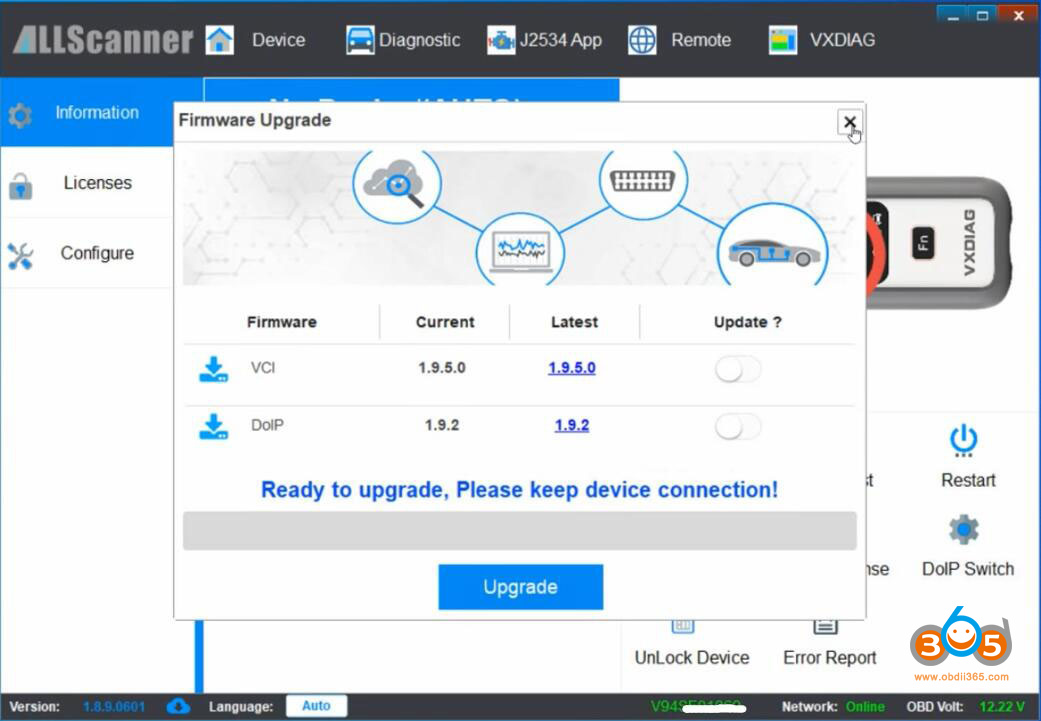
Keep vxdiag firmware and license update to date.
Run Nissan Consult 3 plus software from loader on desktop
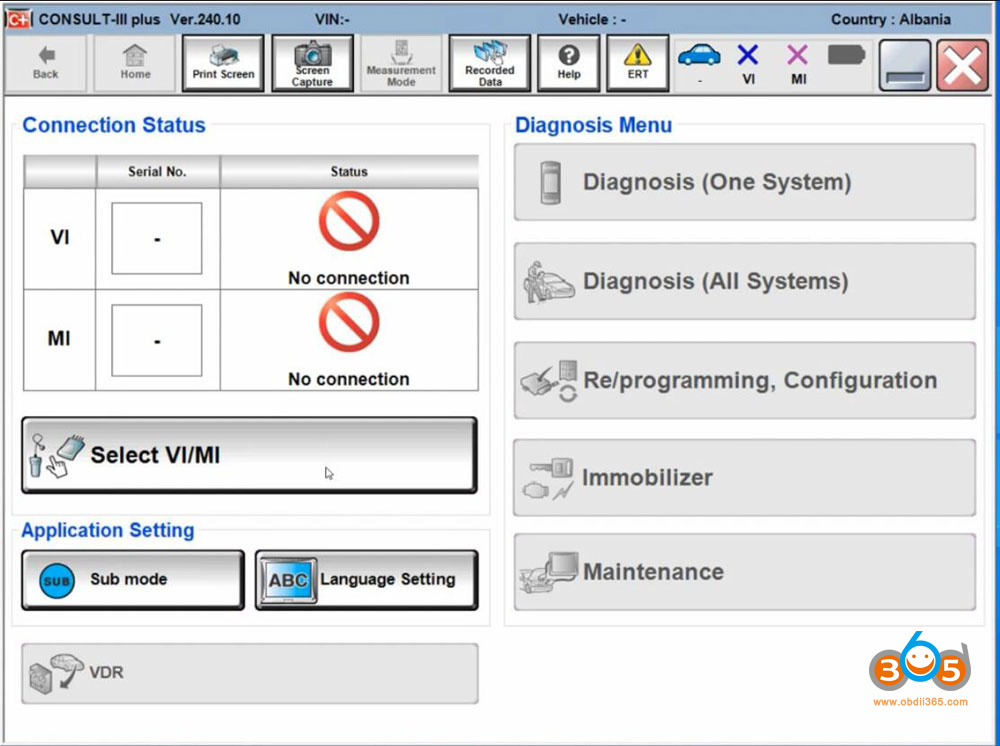
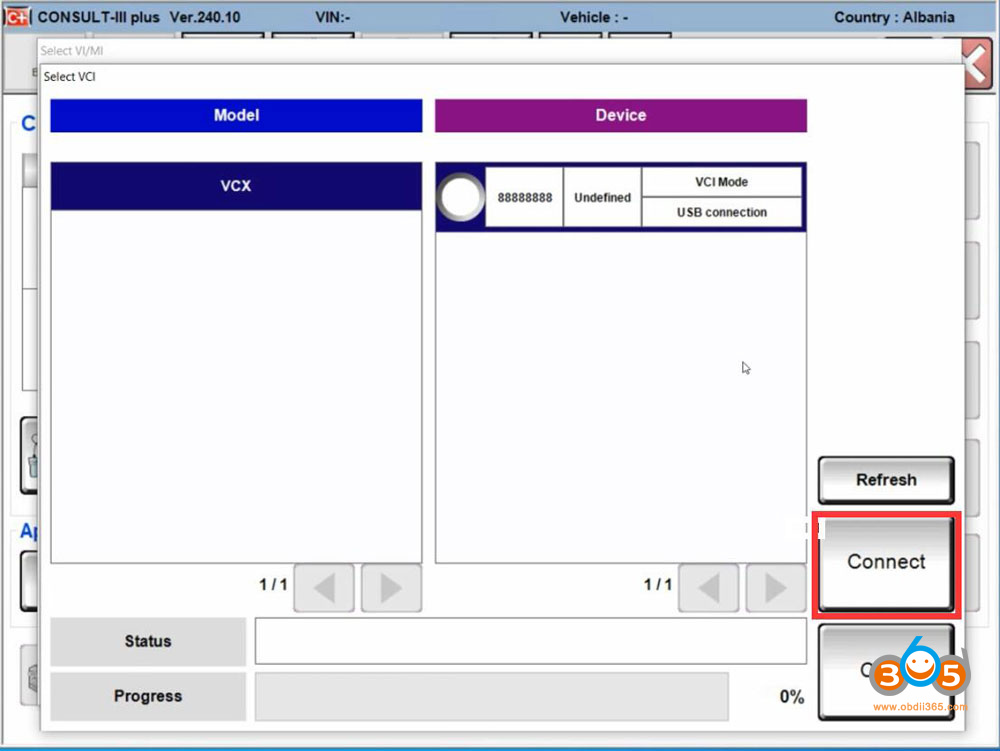
Select VI/MI device
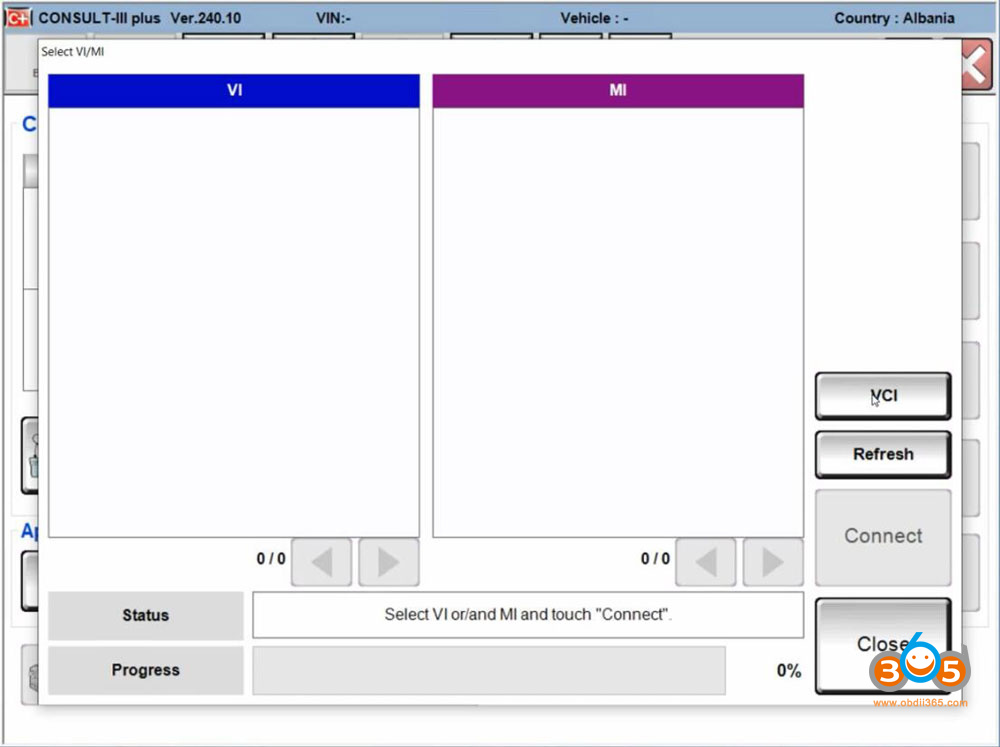
Software will search VCI.
VCX device is detected. Press “Connect” to connect VCI.
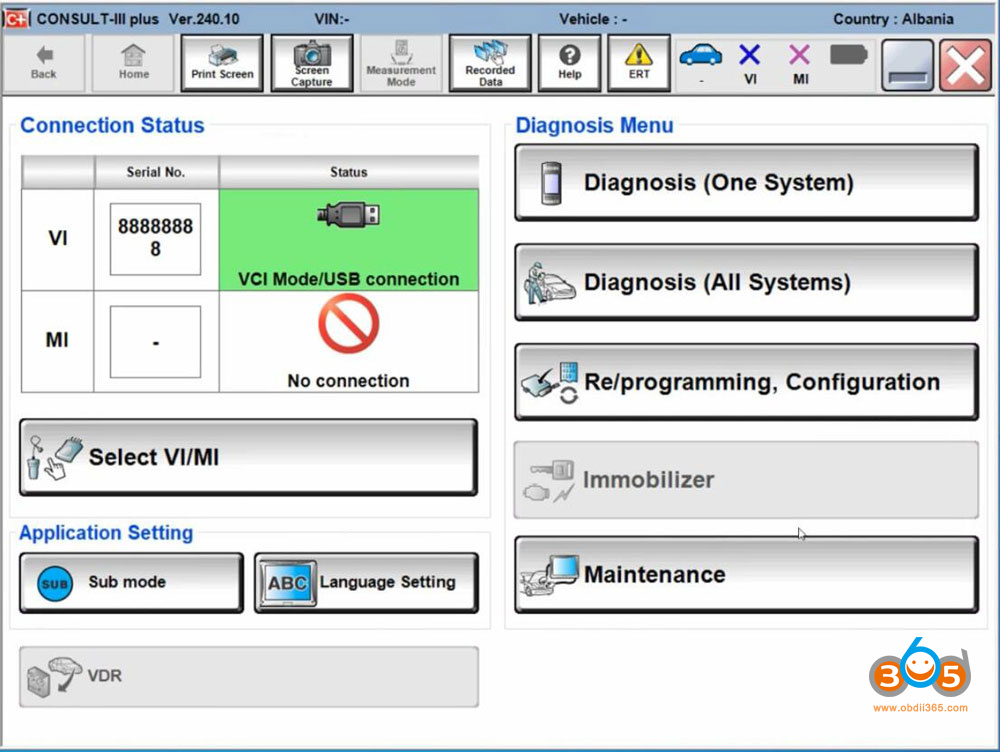
Now software is ready to use.
The immobilizer menu is gray and the DiagnosticTool.ini file needs to be replaced to activate this function.
Quit Consult3 plus software
9.Activate Immobilizer function
Go to Win10Prox64/Consult-iii_Plus/System/Application/ApplicationData/CommonSetting folder
Delete DiagnosticTool.ini file
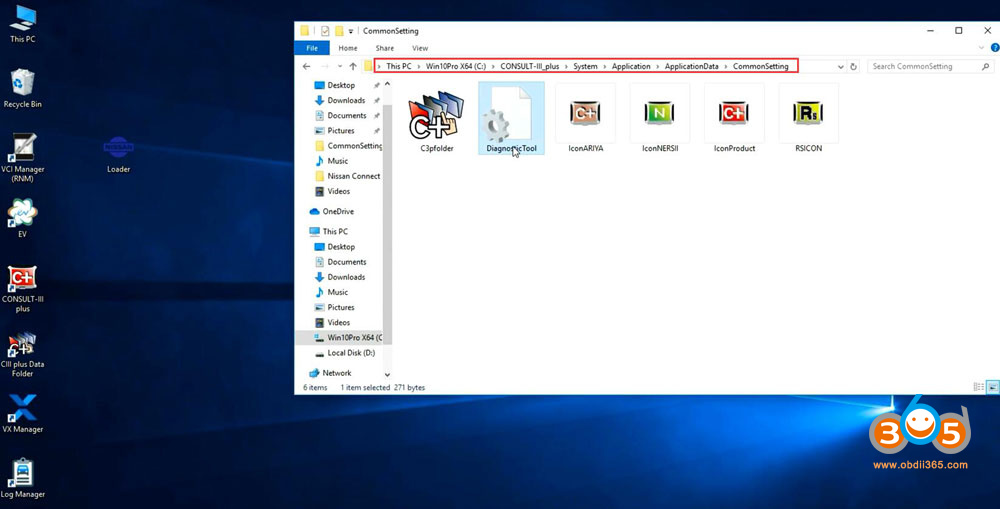
Copy and replace DiagnosticTool.ini file from software folder to the CommonSetting folder
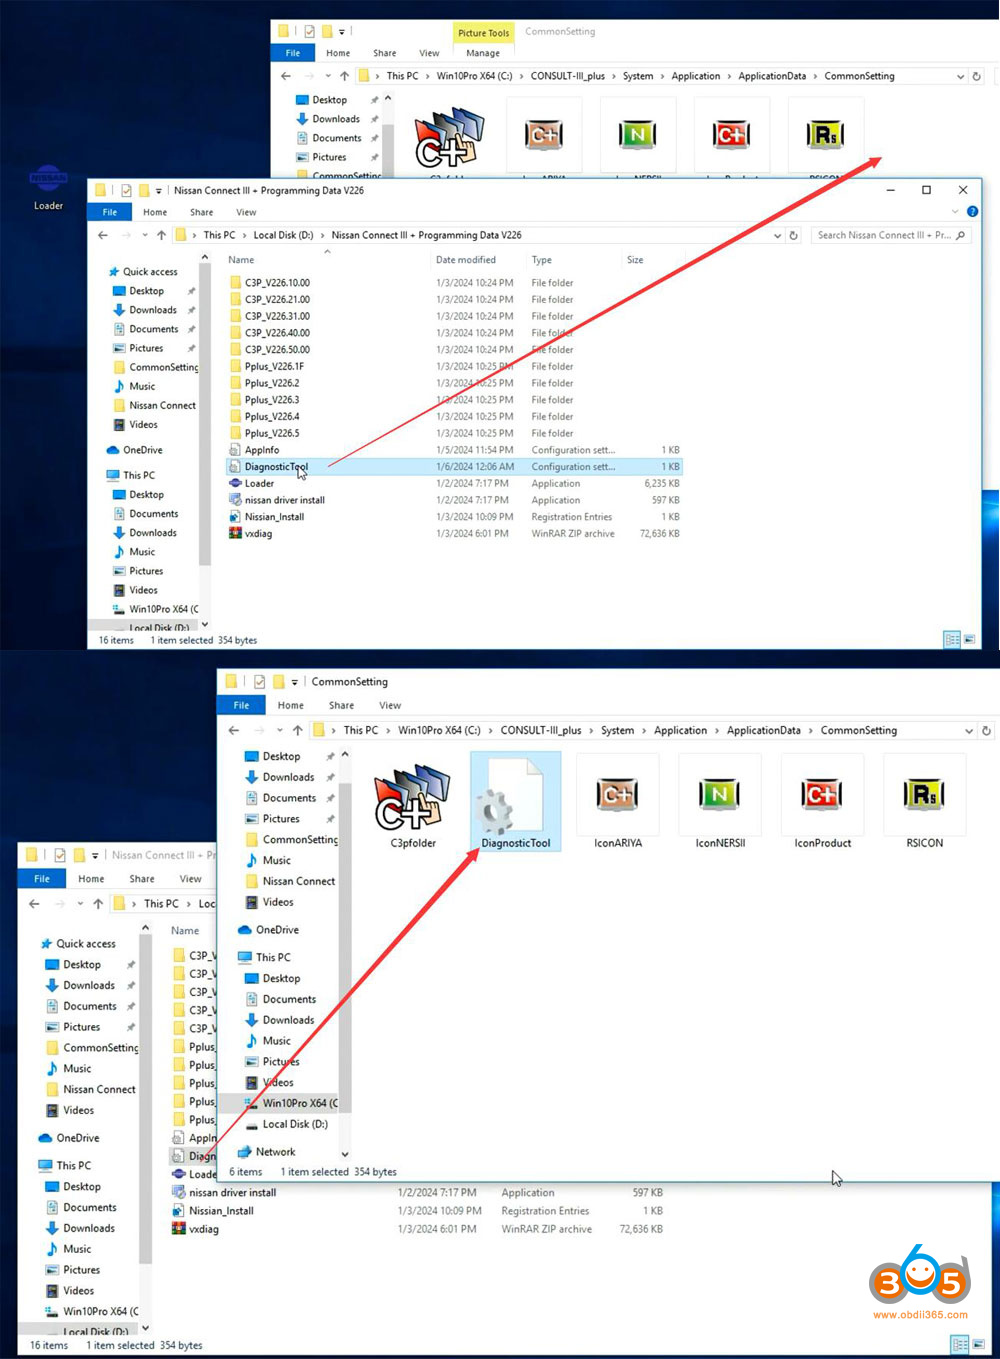
Run Consult iii plus software from Loader again.
Now you will see Immobilizer menu is activated
Software is ready to use.
comment here